The Faucet Cartridge Overview
Defining a Faucet Cartridge
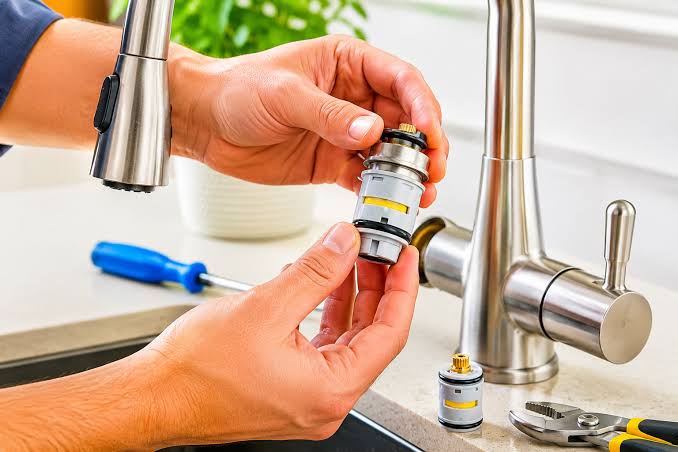
The faucet cartridge is among the most critical components of any faucet, as it is responsible for controlling both the water flow and temperature. Simply put, it is a mechanism that opens and closes the water passage and is connected to the spout. Although the cartridge is built to endure years of continuous use, it eventually wears out, leading to leaks, malfunctioning water pressure, or improper temperature control.
- The Faucet Cartridge Overview
- Indications of a Worn-Out Cartridge
- When to Seek Help
- Tools Required for the Replacement Process
- Materials Needed for the Replacement
- Turning Off the Water Supply Valve
- Preparing the Sink Area
- Step 1: Loosening the Faucet Handle
- Step 2: Removing the Retaining Nut or Clip
- Step 3: Removing the Old Cartridge
- Step 4: Installing the New Cartridge
- Step 5: Reassembling the Faucet
- Step 6: Testing the Faucet
- Common Errors Made During the Replacement Process
- Maintenance Tips
If you are wondering how to replace faucet cartridge, replacing a worn-out cartridge is a much faster and cheaper alternative to replacing the entire faucet. The process only requires some free time and basic tools to complete. Apart from saving money, replacing the cartridge helps reduce water waste, as a faulty one can cause the water to run even when the faucet is turned off.
The Necessity of the Cartridge
The cartridge is the heart of the faucet, and its primary function is to control the water flow and temperature. It is a relatively simple mechanism, so once it starts malfunctioning, the simplest tasks such as running water can become unpleasant and stressful. Replacing the cartridge is the fastest and easiest way to return the faucet to full functionality without having to invest in a brand new fixture.
Learning how to replace faucet cartridge is so easy that most homeowners can complete it on their own without the help of a professional plumber. The benefits of replacing the cartridge extend to saving money on water waste. A faulty component can increase water consumption by several hundreds of gallons, resulting in higher utility bills.
The Signs of a Faulty Cartridge
Indications of a Worn-Out Cartridge
There are several telltale signs that suggest that the cartridge needs to be replaced. The most common one is a dripping faucet that no longer stops water flow even when turned off. Other common symptoms include unsatisfactory hot and cold water pressure, the inability to regulate temperature, stiff movement of the handle, water leaking from the handle itself, and unusual squeaking sounds emanating from the cartridge.
Understanding how to replace faucet cartridge becomes important when these symptoms appear. Most issues develop gradually, so it is best to replace the cartridge as soon as the first symptom becomes evident. Doing so prevents the occurrence of secondary problems and allows the homeowner to enjoy the benefits of a fully functioning faucet.
When to Seek Help
Sometimes, a faulty faucet does not require the cartridge to be replaced. In some cases, a few loose screws or worn-out rubber washers can be the reason behind the improper water flow or unusual squeaking. Before deciding to purchase a replacement cartridge, homeowners should first check the existing ones for damage.
If the screw is intact but the water pressure is low, it is best to clean mineral deposits with vinegar to restore the previous water pressure. If the above-mentioned steps do not yield desirable results, the homeowner may need to replace a faulty cartridge. Knowing how to replace faucet cartridge can save both time and money. In addition, some faucets have been in use for decades, which means that the cartridge is old and more prone to developing issues.
Essential Tools for Replacing a Cartridge
Tools Required for the Replacement Process
Prior to replacing the cartridge, it is best to assemble a list of tools that will be needed for the job. The tools required to replace the cartridge include an adjustable wrench, Allen wrench, Phillips and flat-head screwdrivers, needle-nose pliers, a clean cloth, plumber’s grease, and a towel or a small bucket.
All of the aforementioned tools are rather common; thus, most homeowners should be able to have them at hand when the time comes to replace the cartridge. In addition, a cartridge puller may be needed if the fixture has not been serviced in decades. The tool is necessary because older cartridges tend to be more difficult to remove due to mineral deposits.
Materials Needed for the Replacement
When replacing the cartridge, it is of utmost importance to select the correct material. The type of the cartridge can vary significantly depending on the manufacturer, so it is essential to conduct sufficient research to identify the one that is compatible with the chosen faucet type.
If you are researching how to replace faucet cartridge, most hardware stores will provide the necessary information to help customers purchase the right size. Alternatively, if the previous cartridge has already been removed, the new one can be purchased according to the existing size specifications. When buying a replacement, it is also necessary to purchase a few new O-rings, as they tend to wear out after years of use. The new set should also be installed to ensure that the faucet is functioning properly.
Preparing for a Faucet Cartridge Replacement
Turning Off the Water Supply Valve
Before proceeding to replace the cartridge, it is necessary to make sure that there is no water flowing through the pipes. To do that, the homeowner will need to turn off the water supply by accessing the valves located beneath the sink.
After the valves have been turned off, the faucet should be opened to let out the remaining water in the pipes. During the replacement process, water can accidentally leak, which is why the towel or the bucket should be placed underneath the sink area to catch the dripping water. Although this step takes more time than others, it is necessary to ensure that the working conditions are safe and that no water is wasted during the replacement process.
Preparing the Sink Area
Before attempting to remove the handle, it is necessary to cover the drain with a stopper. Small screws, clips, and washers can easily fall inside the drain, which may make the repair process more difficult than it needs to be.
In addition, the homeowner should cover the sink with a towel to ensure that the tools and the removed parts do not scratch the surface of the sink. To streamline the process of reassembling the faucet, the parts should be placed in order so that they can be quickly accessed. This way, the repair process will be much less stressful than anticipated.
The Process of Replacing a Faucet Cartridge
Step 1: Loosening the Faucet Handle
The first step in the process of replacing the cartridge is to loosen the faucet handle. The decorative cap should be removed by sliding it off or prying it open with a flat-head screwdriver if it is stuck.
The next step is to locate and remove the set screw that is usually placed at the top of the handle. The screwdriver that will be needed to loosen the screw should depend on the type of the faucet. In most cases, the set screw will either have a Phillips or Allen head.
After the screw has been removed, the handle will be loosened and can either be removed or pushed up and down several times before being pulled off. For faucets that have been in use for a long time, the handle must be gently wiggled due to calcium build-up.
Step 2: Removing the Retaining Nut or Clip
After the handle has been loosened and pushed up to access the retaining nut or clip, the next step will be to loosen and remove the retaining clip or nut.
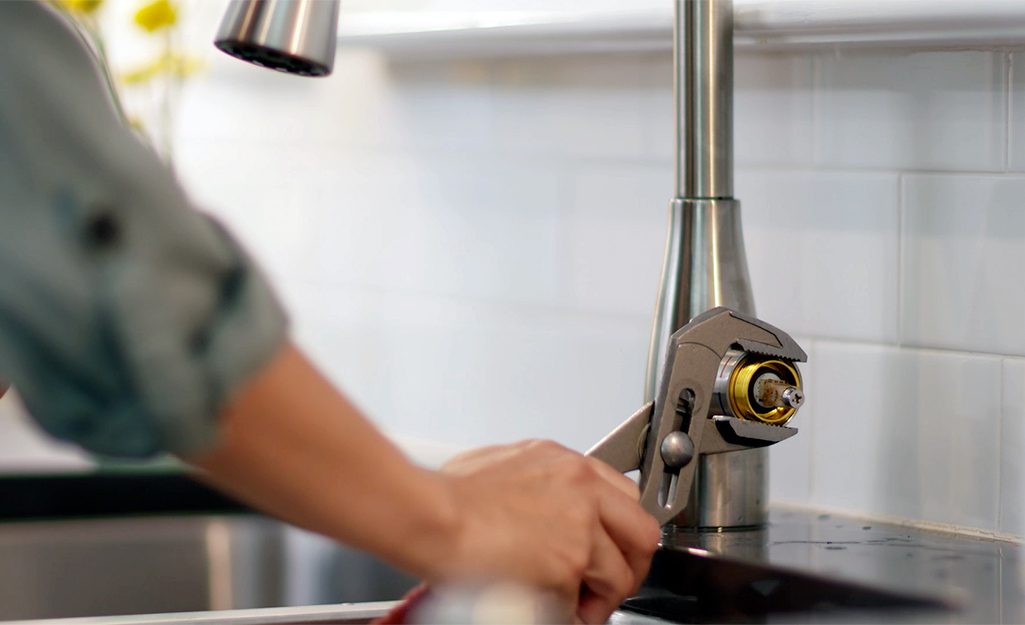
If there is a retaining clip, it can be removed using needle-nose pliers. Alternatively, the retaining nut can be loosened with pliers or an adjustable wrench. It is important to take special care when removing the clip or the retaining nut because the parts are fragile and may be bent or broken when too much pressure is applied.
It is also advisable to clean the mineral deposits to help remove the cartridge later. After the retaining clip or the retaining nut has been loosened and removed, the old cartridge can be removed.
Step 3: Removing the Old Cartridge
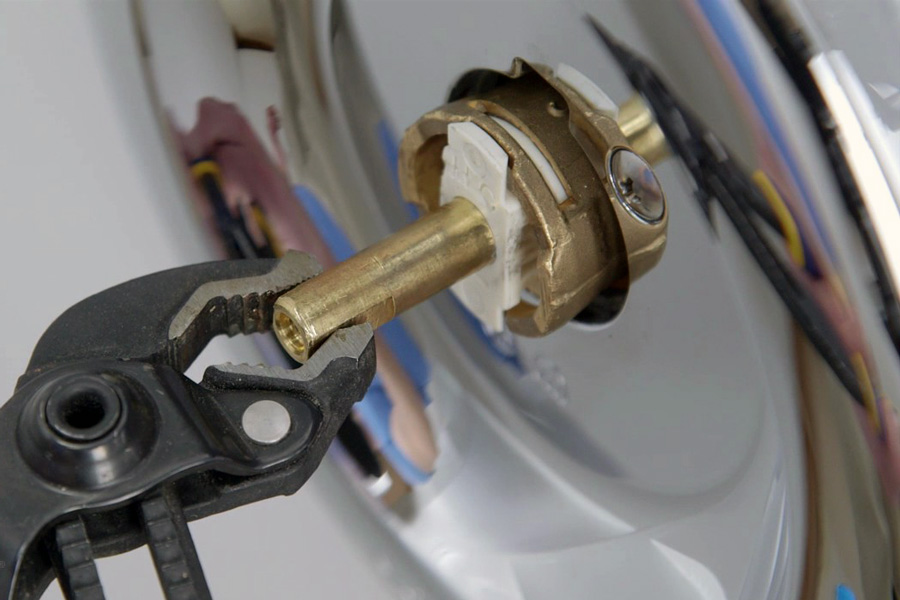
The old cartridge can now be removed by pulling it up, and if it does not come out easily, it can be gently twisted back and forth. The process may become difficult if there are mineral deposits on the cartridge that keep it in place. If that is the case, a cartridge puller may be needed to remove it.
If you are following instructions on how to replace faucet cartridge, this removal process can be tedious and time-consuming if the cartridge has been stuck for a long time. The new cartridge should then be compared to the old one to ensure that they are the same size. Furthermore, the inside of the faucet must be clean to ensure that the new one does not leak.
As the first step in the process of cartridge removal comes to an end, the homeowner will now be able to move on to the last and the most critical stage of the process.
Step 4: Installing the New Cartridge
It is important to make sure that the new cartridge is properly greased before installing it to ensure that it does not stick. The rubber seals should be greased, as well.
The new cartridge is then positioned according to the installation instructions so that the tabs or the grooves match the slots in the faucet. Next, the new cartridge must be pushed down until it reaches the desired position. The retaining clip or retaining nut should then be replaced in the same manner as they were removed to guarantee that the new cartridge will be held firmly in place.
Anyone learning how to replace faucet cartridge should remember that although this step should seem fairly simple, any mistakes during the process can lead to significant complications.
Step 5: Reassembling the Faucet
The next step after the new cartridge has been installed is to reassemble the faucet. The faucet handle must be placed back on the cartridge stem and should be tightened accordingly. The set screw must now be reinstalled.
The decorative cap should then be reinstalled to hide the screw. In addition to the screw, the homeowner must make sure that all of the other parts are returned to their original place before moving on to the final step. All of the steps taken so far resemble closing the book at the end of a project or, similarly, replacing the cap of a jar after opening it.
Step 6: Testing the Faucet
With the new cartridge installed and the faucet reassembled, the homeowner should now be able to test whether the new fixture is working properly.
The final step in how to replace faucet cartridge is to turn the water supply valve on again and allow the water to flow freely through the spout. After the water has been turned on, the homeowner will need to test the hot and cold water pressure and examine the condition of the handle for leaks.
Once the handle has been examined and the water has been turned off, the homeowner will need to double-check that all parts have been assembled correctly. In case of a leak, the water supply valve must be turned off, and the cartridge must be installed again to ensure that it is properly placed.
Common Errors and Maintenance Tips
Common Errors Made During the Replacement Process
One of the most common mistakes made during the cartridge replacement process is purchasing the wrong size. In addition, some homeowners forget to turn off the water supply valve before attempting to remove the faucet parts, which leads to a significant mess.
When learning how to replace faucet cartridge, always remember that turning off the water supply valve is vital to ensure that no unnecessary water is wasted. Other errors include trying to remove the handle by exerting too much pressure, which results in the handle cracking. Similarly, the retaining clip can be bent due to the homeowner trying to remove it with too much force.
Finally, some homeowners do not pay attention to the details when reassembling the faucet, thus forgetting to ensure that the inside of the faucet is clean before installing the new cartridge.
Maintenance Tips
The new cartridge should be carefully maintained to ensure that it can provide the homeowner with high-quality service for a long time.
Firstly, the faucet should be cleaned regularly to prevent the formation of calcium deposits, which can hinder the proper functioning of the new cartridge. If the area has hard water, it may be a good idea to invest in a water softener.
Secondly, the handle should not be moved too forcefully, as it can cause the internal parts of the faucet to crack.
Finally, homeowners who know how to replace faucet cartridge should also remember to detect and treat leaks immediately after noticing them. It is important to address these minor issues promptly because, if left unattended, they might develop into more severe problems.
Conclusion
The process of replacing the faulty cartridge is fairly simple and can be completed with minimal effort and time. After detecting the signs that suggest that the cartridge needs to be replaced, the homeowner will be able to purchase the right tool and the appropriate materials.
By following this guide on how to replace faucet cartridge, the broken cartridge will then be removed and replaced with the new one. Finally, the new components will allow the homeowner to enjoy the benefits of a fully functioning faucet.
Frequently Asked Questions
How long do faucet cartridges usually last?
Most cartridges can last for 10 to 20 years, depending on the quality and the water pressure.
Can I replace a cartridge myself?
Yes. Once you understand how to replace faucet cartridge, most homeowners can complete the replacement without hiring a professional plumber.
Why is my faucet still leaking after replacing the cartridge?
The new cartridge could have been wrongly installed, or it does not match the old one. A faulty O-ring can also cause the faucet to leak.
Are all cartridges compatible with all faucets?
No. Many manufacturers make their own cartridges, which means that they are not compatible with other brands.
Do I need to grease the new cartridge?
Yes. Most manufacturers recommend greasing the new cartridge to ensure that it moves smoothly and fits snugly into the faucet without causing any leaks.